White
White
 Pink
Pink
 Red
Red
 Orange
 Ivory
Ivory
 Yellow
 Gold
Gold
 Brown
Brown
 Green
Green
 Blue
Blue
 Purple
 Grey
Grey
 Black
Black
 Multi
Multi
 Abstract
 African Print
 Animal Print
 Baby & Nursery
 Buffalo Check
 Camo Print
 Celestial
 Church
 Damask
 Embroidered
 Floral
 Geometric
 Gingham Check
 Houndstooth
 Licensed
 Paisley
 Plaid
Plaid
 Polka Dot
 Sports
 Stripe
 Tie Dye

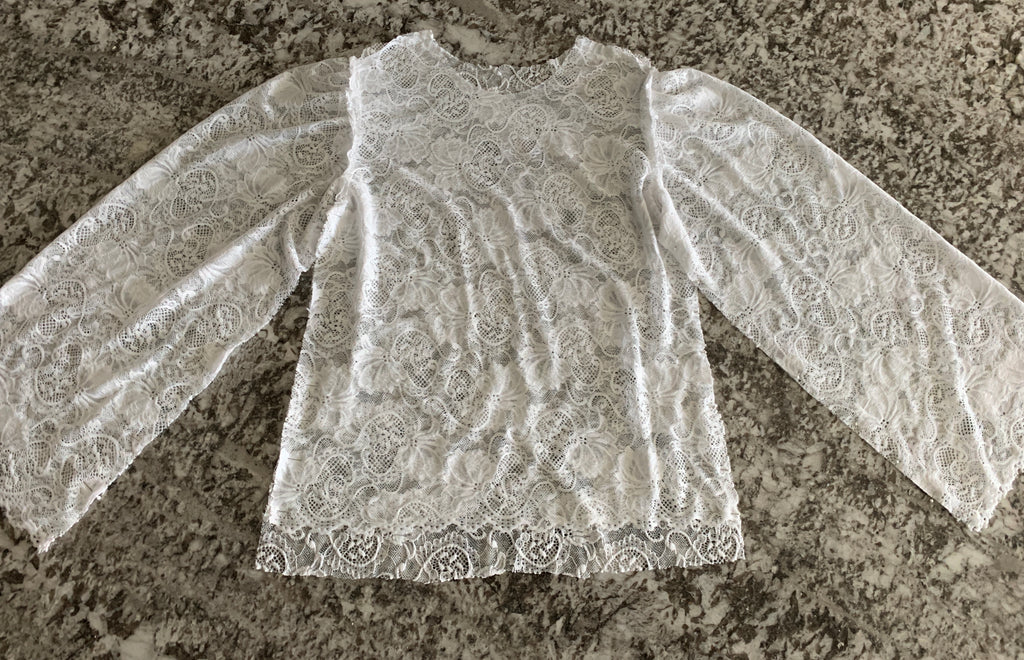
A DIY Lace Bubble Sleeve Top Sewing Tutorial
In the last year, statement sleeves have really made a comeback. Bell sleeves, flounce sleeves, cold shoulder, ruffles, puff sleeves, you name it. One of the most romantic looks is the bubble sleeve. The construction of a bubble sleeve is not much different from a normal sleeve. You start by taking a simple sleeve construction, and then you stretch out the width. The top of the sleeve should be slightly wider to incorporate a puff (this is optional, but helps to balance out the bubble at the cuff). The bottom of the sleeve should flare out instead of tapering to match the width of your wrist. Once you have sewn the sleeve as you normally would, you cinch together the cuff of the sleeve to result in a bubble shape. Incorporating the bubble sleeve trend with a lace fabric takes a little bit of planning at the front end, but simplifies your sewing process overall. By lining up your sleeve length and the bottom of the front of the shirt with the scalloped edge of the fabric, you can avoid hemming the sleeves and bottom of the shirt! It also results in a very romantic and girly finish. Grab a tee shirt you already own to create the bodice of this pattern, and get to work following the instructions below!
Supplies:
- 2 yards of Victoria Stretch Lace in White
- 1 yard 1/8" White Ribbon
- White Thread
- Sewing Machine
- Pins
- Scissors
- Measuring Tape
- Fitted Tee Shirt to be used as a pattern
Time:
3-4 Hours
Difficulty:
Easy/Medium
LET'S GET STARED!
- Lay your fabric out on a flat surface and fold over about half the width of your tee shirt. Fold your tee shirt in half so that half of the front is showing and line the fold up with the fold of the fabric. Tuck the sleeves in and the neck. Line up the bottom hem of the shirt so that the bottom has the scallop of lace sticking out. Cut around the tee shirt with 1/2" of seam allowance all the way around to make the FRONT. Repeat with the back of the shirt, moving the pattern up along the same fold and not using the scallop edge to make the BACK. (NOTE: IF you wish to have the perfect scallop edge all the way around and on the sleeves, you will have to buy more fabric.)

- To create the sleeves, fold the fabric in half with the scalloped edges lined up at the bottom. Measure the length of your arm hole on the FRONT and BACK pieces you just made. Add these two measurements together and add 6". This will be the width of the SLEEVE. Measure from your arm pit to just past your wrist. This will be the length of the side of the SLEEVE. Add 7" to this measurement and that will be the length of the center section of the SLEEVE. Mark out the shape of the SLEEVE in pins based on the measurements you took and cut around them to make two sleeves.

- Place the FRONT on to the BACK with the shoulders lined up and the right sides of the fabric touching. Pin the shoulders together and sew.

- Take your SLEEVE fabric and create 6 1/2" knife pleats along the center of the curved edge of the fabric. Pin them down and sew along them to secure. Repeat on the other SLEEVE.


- Open up the bodice with the right side of the fabric facing up. Place each SLEEVE piece in line with the arm hole of the bodice with the right side of the SLEEVE touching the right side of the bodice. Pin them together and sew along the pins to attach both sleeves.

- Complete the construction of the shirt by folding the top layer of the shirt on top of the bottom layer with the sides of the sleeves and bodice lined up and the right sides of the fabric touching on the inside. Sew along each side of the bodice and under the arms. You will be left with a bell sleeve top with puff shoulder sleeves at this point.
- To create the bubble sleeve, use a large needle to thread your 1/8" ribbon through the lace about 2" from the edge of the cuff. Once you reach the starting point, even out the ends of the ribbon and tie into a bow. Complete on both sleeves.


This Tutorial was created by Julia Bleck of Sew Bake Decorate