Project Description
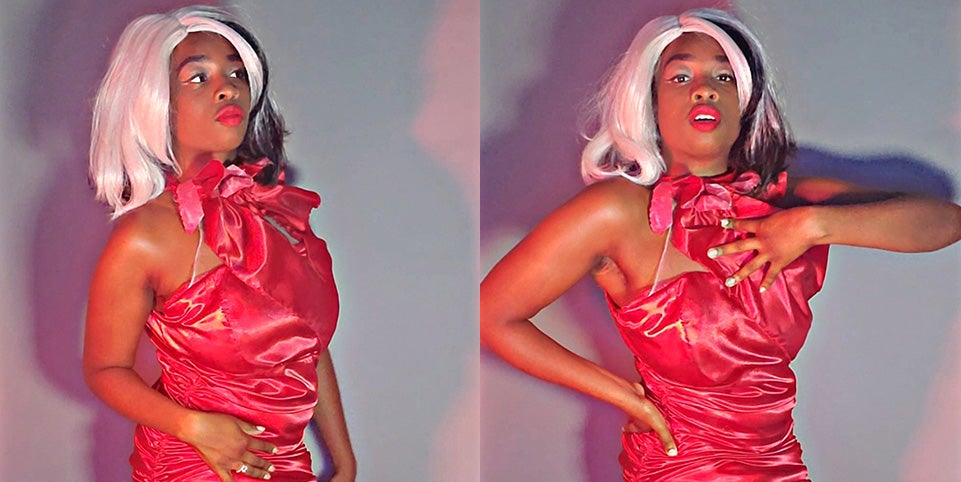
Turn heads this winter season with your own Faux Leather Cosplay Jacket. Using the tutorial below, sewing a Faux Leather Cosplay Jacket can be done in just a few simple steps; no advanced tools are needed. Waterproof and warm, this Faux Leather Cosplay Jacket is stylish and a cruelty-free alternative to a leather jacket. Whether you are fighting crime or going to a costume party, this chic Faux Leather Cosplay Jacket is perfect for SEW many applications. Check out this tutorial and add a Faux Leather Cosplay Jacket to your wardrobe.
Supplies
Here's what you will need!
- Mccalls Costume Pattern M8230
- 3 Yards of White Vinyl
- 3 Yards of White Broadcloth
- 3 Yards of Sew-in Interfacing
- Sewing Machine I'm using the ST150HDH from Brother
- Scissors
- Thread
- Teflon sewing foot
- Leather sewing machine needles
- Hook and bar closures
- Hand sewing needles
- Wonder clips


Faux Leather Cosplay Jacket
STEP 1 Analyse The Pattern
Follow the pattern measurement guide to figure out which specific pieces you'll need.
STEP 2 Cutting The Pattern
Cut out your pattern pieces following the pattern guidelines for your lining fabric and sew-in interfacing.
STEP 3 Machine Settings
Install a leather needle and Teflon foot on your sewing machine. For this project keep your sewing tension on number 3, and your stitch width on number 3.5
STEP 4 Baste Interfacing
Baste interfacing to pieces 10, 11, 13, and 16 using the longest stitch length available on your machine.
STEP 6 Stitch Side Front Pieces
Pin the side front (Pieces 2, 3, or 4) to the front of the garment and stitch using a number 3.0 stitch length. Next, backstitch twice on both ends of the garment.
STEP 7 Stitch Side Back To Front
Stitch the side back (Piece 5) to the side front using a number 3.0 stitch length. Then, backstitch the garment twice on both ends.
STEP 8 Stitch Side Edges to Piece 9
Stay stitch the side edges of the back of the garment (Piece 9) using a number 3.0 stitch length.
STEP 9 Stitch Side Back to Piece 5
Stitch the side back sections of the garment to the side edges (Piece 5) using a number 3.0 stitch length. After, backstitch both ends.
STEP 11 Sticth Back And Front
Stitch the back and front sections together at the shoulders using a 3.0 stitch length. Next, backstitch the garment twice on both ends.
STEP 12 Sticth The Neck Edge
Stay stitch the neck edge of the jacket using a number 3.0 stitch length.
STEP 13 Stitch The Under Collar At Back
Stitch the under collar (Piece 10) at the center back using a number 3.0 stitch length. Backstitch twice on both ends.
STEP 14 Stitch The Collar To Dress
Stitch the under collar to the dress matching the center. Use a number 3.0 stitch length, and after, backstitch twice on both ends.
STEP 15Upper Edge Of Sleeve
Ease stitch the upper edges of the sleeve (Piece 14) using a number 3.0 stitch length.
STEP 16 Stitch The Sleeve
Pin the sleeves and stitch them closed using a number 3.0 stitch length. Backstitch twice on both ends.
STEP 18 Stitch The Hem
Stitch the hem in place, close to fold, using a 3.0 stitch length. Next, backstitch twice on both ends.
STEP 19 Stitching The Sleeve To Armhole
With their respective right sides together, stitch the sleeve into it’s armhole using matching seams. Use a 3.0 stitch length and backstitch 3 times at both ends.
STEP 20 Front Facing
Repeat step number 5 for the front-facing (Piece 11), and stay stitch the Front (Piece 1) above the waistline with a number 3.0 stitch length.
STEP 21 Stitch Front Facing to Front Lining
With their right sides together, stitch the front-facing (Piece 11) to the front lining (Piece 12) using a number 3.0 stitch length and backstitch twice at both ends.
STEP 22 Stitch Side Front Lining
Stitch the side front lining (Pieces 2,3 or 4) to the front lining using a number 3.0 stitch length and backstitch twice at both ends.
STEP 23 Back Lining
Repeat step number 8 for back lining (Piece 9). Stay stitch the side edges of the back (Piece 9) using a number 3.0 stitch length.
STEP 24 Back Lining And Side Edges
Repeat step number 9 for the back lining and the side edges of the lining (Piece 5). Stitch the side back sections to the side edges (Piece 5) using a number 3.0 stitch length. Backstitch both ends.
STEP 25 Shoulder Seems
Repeat step number 11 for the shoulder seams of the lining and facing. Stitch the back and front sections together at the shoulders using a number 3.0 stitch length. Backstitch twice on both ends.
STEP 26 Neck Edge Lining
Repeat step number 12 for the neck edge of the lining. Stay stitch the neck edge of the jacket dress using a number 3.0 stitch length.
STEP 27 Under Collar Lining
Repeat step number 13 for the under collar of the lining. Stitch the under collar (Piece 10) at the center back, using a number 3.0 stitch length. Backstitch twice on both ends.
STEP 28 Sleeve Lining
Repeat step number 16 for the sleeve lining. Pin the sleeves and stitch them closed using a number 3.0 stitch length. Next, backstitch the garment twice on both ends.
STEP 29 Stitch Sleev To Armhole
Repeat step number 19 for the sleeve lining. First pin, then stitch the sleeve into the armhole using matching seams. Use a number 3.0 stitch length and backstitch 3 times at both ends.
STEP 30 Stitching Collar, Facing And Lining To Jacket
With right sides together, pin and stitch upper collar, facing, and lining to the jacket. Use a 3.0 stitch length and backstitch 3 times at both ends.
STEP 31 Continue Stitching
Stitch across the facing above the lower edge. Trim below the stitching using a number 3.0 stitch length.
STEP 32 Placing Sleeve Lining
Turn the facing/lining to the inside, turning the collar right side out and slipping the sleeve lining in place.
STEP 38 Stitch Sleeve Lining To Hem
Hand stitch the lining of the sleeve into sleeve hem of the jacket dress.
STEP 40 Stitch The belt
With their right sides together, fold the belt and stitch using a 3.0 stitch length. Backstitch on both ends and leave an opening.
STEP 42 Fininshing Of Belt
Turn the belt right side out, Stitch the belt using a topstitch with a number 3.0 stitch length to seal the opening.

 Transparent
 White
White
 Pink
Pink
 Red
Red
 Orange
 Ivory
Ivory
 Yellow
 Gold
Gold
 Brown
Brown
 Green
Green
 Blue
Blue
 Purple
 Grey
Grey
 Black
Black
 Multi
Multi
 Abstract
 African Print
 Animal Print
 Baby & Nursery
 Buffalo Check
 Camo Print
 Celestial
 Chevron
 Church
 Damask
 Embroidered
 Floral
 Geometric
 Gingham Check
 Houndstooth
 Licensed
 Paisley
 Plaid
Plaid
 Polka Dot
 Sports
 Stripe
 Tie Dye


2 comments
Charlotte Carter
Your work is beautiful. Is this pattern available for sale?
Your work is beautiful. Is this pattern available for sale?
Tishea Davis-Hackamack
A very nice project and styling.
A very nice project and styling.