White
White
 Pink
Pink
 Red
Red
 Orange
 Ivory
Ivory
 Yellow
 Gold
Gold
 Brown
Brown
 Green
Green
 Blue
Blue
 Purple
 Grey
Grey
 Black
Black
 Multi
Multi
 Abstract
 African Print
 Animal Print
 Baby & Nursery
 Buffalo Check
 Camo Print
 Celestial
 Church
 Damask
 Embroidered
 Floral
 Geometric
 Gingham Check
 Houndstooth
 Licensed
 Paisley
 Plaid
Plaid
 Polka Dot
 Sports
 Stripe
 Tie Dye

Project Description
Due to the comfort it provides a garment and its laid-back look, shirring has completely taken over the sewing pattern world this Summer! Shirring may look difficult to achieve, but it is really easy to do on any sewing machine because it only requires a straight stitch and some adjustments to the tension. The basic concept is to wind the bobbin with elastic thread and sew straight stitches one after another in multiple rows to make a bodice, a waistband, or even an entire skir
How to do Shirring
STEP 1 Cutting
Begin by cutting out your fabric for your project. The shirring will usually shrink the width of the fabric by about 35-50%. In this example, the fabric swatch goes from 6.5”to 4.25” wide. You can further shrink the width by holding a steam iron over the fabric (not touching) and pulsing steam at it. Although the shirring is elastic, it is not incredibly tight, so take this into account when determining how wide to cut your fabric.


STEP 2 Wind The Thread On Bobbin
Before getting started with sewing you will need to wind your bobbin by hand with the elastic thread. Make sure to wind the thread evenly on the bobbin, not pulling too tight or leaving it too loose. Fill the bobbin with as much thread as you can hold and insert it into your machine.
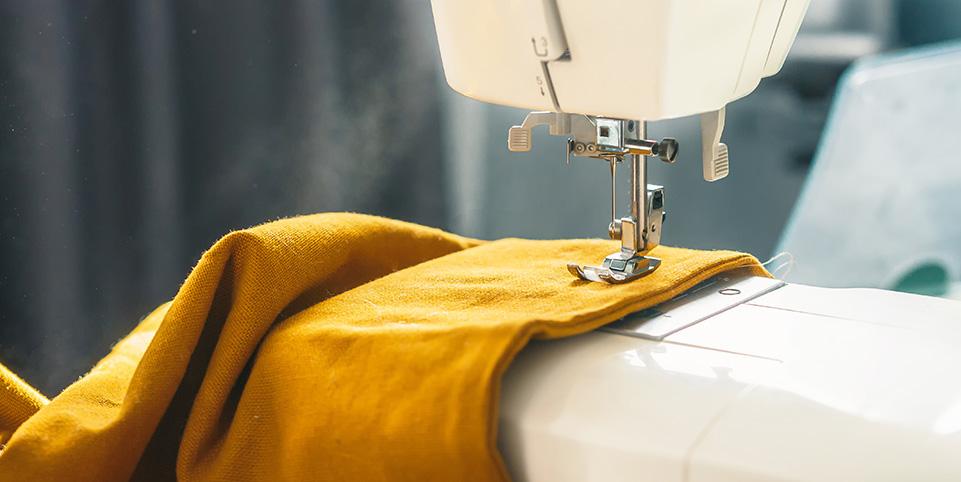
STEP 3 Machine Adjustments
Place your fabric into your sewing machine and line up the edge about 3/8” from the edge of the fabric. Make the following adjustments to your machine:
a. Set the machine to a straight stitch setting.
b. Increase the length of your stitch to a longer length than normal, somewhere between a 4 and 5.
c. Leave the width of the stitch alone (this is not needed as we are sewing a straight stitch).
d. Adjust the tension to be higher than normal. For instance, if you normally sew at a 5,increase to a 7 or 8.


STEP 4 Start Sewing
Start sewing a straight line, making sure to keep the edge of the fabric 3/8” from the edge. You do not need to backstitch at the startor end of the stitching as long as you are careful not to pull the threads out and plan to sew along the sides of the fabric (for example, attaching a front and back shirred bodice together). This will help you to conserve elastic thread. Continue sewing straight until you get to the end of the fabric. Try to cut the elastic thread close to the sewing machine so that you do not waste a lot of thread.
STEP 5 Repeat
Repeat this process with another straight stitch which is about 3/8” away from the previous stitch. It is important to try to keep these seam lines parallel with one another as the clean lines will make the shirring look a lot better. Continue adding rows of stitches one after the other, always keeping the same distance between them.