White
White
 Pink
Pink
 Red
Red
 Orange
 Ivory
Ivory
 Yellow
 Gold
Gold
 Brown
Brown
 Green
Green
 Blue
Blue
 Purple
 Grey
Grey
 Black
Black
 Multi
Multi
 Abstract
 African Print
 Animal Print
 Baby & Nursery
 Buffalo Check
 Camo Print
 Celestial
 Church
 Damask
 Embroidered
 Floral
 Geometric
 Gingham Check
 Houndstooth
 Licensed
 Paisley
 Plaid
Plaid
 Polka Dot
 Sports
 Stripe
 Tie Dye

Project Description
Knowing how to thread a sewing machine is a basic sewing skill that you will need to have before you can start using your sewing machine. Guiding the thread through the sewing machine correctly can be overwhelming for a beginner, but with this guide, threading a sewing machine can be simple. In this step-by-step tutorial, you’ll learn how to thread a sewing machine – including how to wind a bobbin, how to thread the upper thread, and how to load the bobbin.
Supplies
Here are the supplies you’ll need to thread a sewing machine.
- Thread Spool
- Bobbin
- Needle
- Sewing Machine
- Scissors

How To Wind A Bobbin
Before threading your sewing machine, you will first need to fill a bobbin with thread – a process called winding the bobbin.
STEP 1 Prepare The Thread And Bobbin
First, place a full spool of thread onto the spool pin, on top of the machine. Place the spool cap on top of the spool of thread to secure it in place.


STEP 2 Take The Thread Through The Thread Guide
Next, pull the thread to the left, and pass it under the metal thread guide closest to the spool.
STEP 3 Wrap The Thread Around The Tension Disk
Wrap the thread once around the bobbin winder tension disk in a counterclockwise direction – this disk is the round metal piece near the first thread guide.


STEP 4 Place The Thread On The Bobbin
Pull the thread to the right of the bobbin winder tension disk, then push the thread tail through the small hole to one side of the empty bobbin. The thread should be pushed from the inside of the bobbin, to the outside.
STEP 5 Put The Bobbin On The Spindle
Next, push the bobbin onto the bobbin winder spindle to the right of the thread spool pin. The thread should be coming out of the top of the bobbin. Push the bobbin firmly to the right until it “snaps” into place. Make sure not to release the thread tail during this process.


STEP 6 Start Winding The Bobbin
Hold the thread tail so that it stays on the bobbin and slowly press down on the foot pedal. This will start the bobbin winding process.
STEP 7 Trim The Thread Tail
After a few layers of thread are wound onto the bobbin, take your foot off the pedal to stop the winding. Then, trim the thread tail away, close to the top of the bobbin.

STEP 8 Finish Winding The Bobbin
Press in the foot pedal again to restart the winding process. Continue holding the foot pedal in until the bobbin is full of thread. Once full, stop winding and push the bobbin to the left until it “snaps.” Now, cut the thread between the bobbin and the thread spool. The bobbin is ready to use.
Threading The Upper Thread
Next, the upper thread – which is the thread that goes through the needle – will be threaded through the upper components of the machine.
STEP 1 Prepare The Machine For Threading
Start by placing the thread spool on the spool pin, on the top of your sewing machine. Then, slide the spool cap on top of the spool to hold it in place.


STEP 2 Thread The First Thread Guide
Next, take the thread through the first thread guide – the metal guide that is closest to the spool of thread.
STEP 3 Thread The Second Thread Guide
Wrap the thread around the second thread guide, which is a hook-like piece of metal that is found to the left of the first guide. Along the left-hand side of the thread guide, make sure the thread slides into the slit, in between the metal plate and the thread guide.


STEP 4 Thread The Tension Disks
Guide the thread down into the slit, at the top of the machine. Make sure the thread goes between the tension disks at the front of the slit.
STEP 5 Thread The Take-Up Lever
Next, pull the thread down through the right slot, in the front of the machine. Next, wrap the thread around the bottom, then take it up through the left slot, in the front of the machine. Guide the thread around the take-up lever at the top of the left-hand slot, from right to left.


STEP 6 Thread The Third Thread Guide
Take the thread down through the left-hand slot, in the front of the machine towards the needle. At the bottom of the left-hand slot will be a third metal thread guide. Pass the thread behind this thread guide.
STEP 7 Thread The Final Thread Guide
Pull the thread down towards the needle to the final thread guide, which is a metal guide at the top of the needle. Now, push the thread into the left-hand slot.
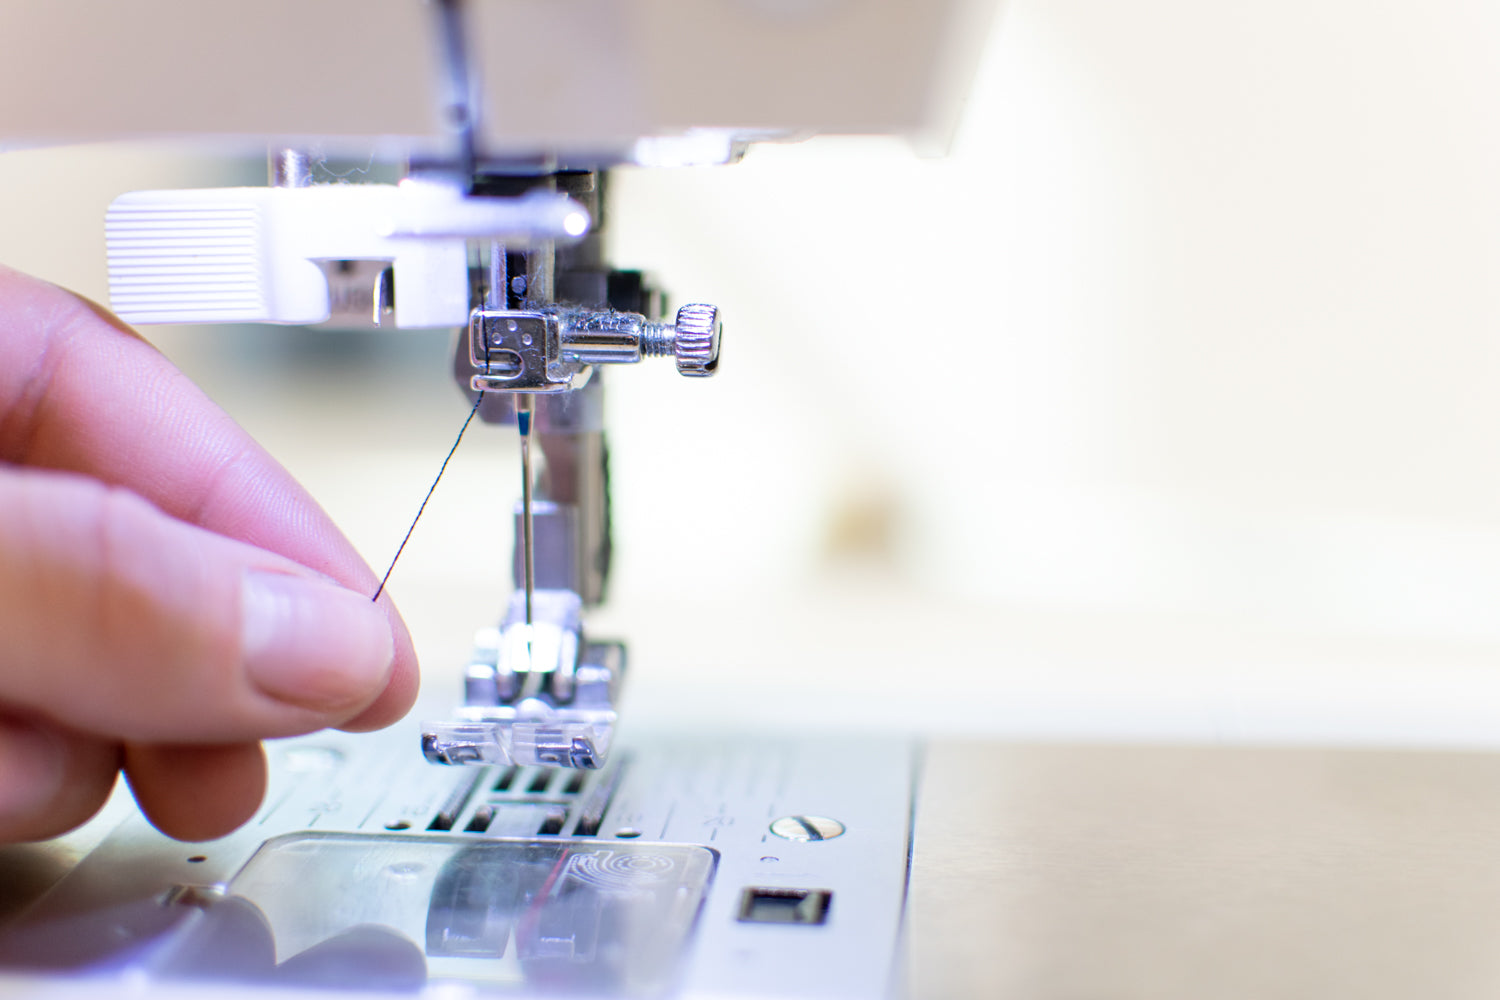

STEP 8 Thread The Needle
Finally, guide the end of the thread through the eye of the needle, from front to back. Pull out the long thread tail, and slide it under the presser foot. Be sure to pass it through the hole in the top of the presser foot.
How To Put A Bobbin In A Sewing Machine
With the upper thread in place, you’ll now need to load your prepared bobbin into your sewing machine. There are 2 types of bobbin housings,a top loading bobbin, and a front loading bobbin. Top loading bobbins are loaded from above, while front loading bobbins are loaded vertically below the needle. In the next section we will be discussing top loading bobbins. If you have a front loading bobbin, skip these next four steps.
How To Load A Top Loading Bobbin
STEP 1 Remove The Housing Cover
Start by removing the cover over the bobbin housing area.


STEP 2 Drop In The Bobbin
Check your sewing machine manual to find out if your bobbin should be loaded with the thread clockwise or counterclockwise. This direction will be specific to your sewing machine brand and model. Make sure the thread is coming off of the bobbin in the correct orientation, then drop the bobbin into the opening of the bobbin housing.
STEP 3 Take The Thread Through The Thread Guides
Pull the thread tail through the thread guides, next to the bobbin. Make sure to follow the arrows marked on your machine, and the directions in your user’s manual. How the thread should be passed through these guides will depend on your specific sewing machine model.


STEP 4 Replace The Housing Cover
Finally, placethe bobbin housing cover back on the sewing machine. Your sewing machine is fully threaded and ready to sew.
How to Load a Front Loading Bobbin
STEP 1 Remove The Housing Cover
First, remove the bobbin housing cover. Where exactly the cover is located will depend on your sewing machine model. In the vintage sewing machine pictured in these photos, the bobbin housing is accessed by lifting the machine up and away from its base. In most newer machines, there will be a way to open the front of the machine below the needle.


STEP 2 Remove The Bobbin Case
Once you have gained access to the bobbin area, remove the circular bobbin case from the bobbin housing. Do this by holding the lever at the center and pulling the bobbin case straight out away from the machine.
STEP 3 Insert The Bobbin Into The Bobbin Case
Next, check your user’s manual to determine if your bobbin should be loaded with the thread clockwise or counterclockwise. This direction will depend on your specific machine. With the thread oriented in the correct direction, slide the bobbin into the open side of the bobbin case.


STEP 4 Take The Thread Through The Thread Guides
Pull the thread into the slit in the edge of the bobbin case, then guide the thread to the left. Slide the thread underneath the metal plate in the side of the bobbin case. The thread should now be coming out of the hole in the side of the bobbin case.
STEP 5 Return The Bobbin Case To The Housing
Finally, return the bobbin case to the sewing machine., Now with the bobbin inside, make sure the bobbin case snaps into place. Close the bobbin housing area, and your sewing machine is now ready for sewing.