


 Transparent
 White
White
 Pink
Pink
 Red
Red
 Orange
 Tan
Tan
 Beige
Beige
 Ivory
Ivory
 Yellow
 Gold
Gold
 Brown
Brown
 Green
Green
 Blue
Blue
 Purple
 Grey
Grey
 Black
Black
 Multi
Multi
 Abstract
 African Print
 Animal Print
 Baby & Nursery
 Beach
Beach
 Buffalo Check
 Camo Print
 Celestial
 Chevron
 Church
 Damask
 Embroidered
 Floral
 Food
Food
 Geometric
 Gingham Check
 Glitter
 Heathered
 Holographic
 Honeycomb
 Houndstooth
 Iridescent
 Licensed
 Nautical
 Paisley
 Patriotic
 Plaid
Plaid
 Pleated
 Polka Dot
 Rainbow
 Solid
Solid
 Sports
 Stripe
 Tie Dye
 Tropical

Introduction
Download the free pattern used in this sewing tutorial to follow along:

A Mollie Blazer is a modern fashion essential that seamlessly bridges the gap between structured, professional tailoring and the soft, casual comfort of everyday knitwear. Designed specifically for medium to heavy weight knit fabrics, this blazer offers a relaxed yet polished silhouette featuring an integrated shawl collar, a single-button closure, and clean, unlined interiors finished with beautiful double-fold bias tape. It is the ultimate layering piece, looking just as smart paired with trousers for a work meeting as it does with jeans for a weekend outing.
While sewing a tailored jacket can often feel like a daunting prospect reserved for master tailors, the Mollie Blazer breaks down these complex concepts into highly approachable steps. By utilizing stable knit fabrics like Ponte Roma and reinforcing key areas with fusible stretch interfacing, you can achieve professional-looking structure without the fuss of traditional pad stitching, sleeve heads, or complex lining integration.
In this comprehensive DIY guide, you'll learn everything you need to know to draft, cut, assemble, and finish your own Mollie Blazer. Whether you are a beginner looking to dip your toes into structured garments or an intermediate sewist refining your knitwear techniques, this tutorial will help you create a custom-fit blazer you will be proud to wear.
What Is the Mollie Blazer?
The Mollie Blazer represents a contemporary shift in tailoring, prioritizing comfort and ease of wear without sacrificing form. It takes the classic single-breasted blazer silhouette and reinterprets it through the lens of modern textile technology.

Traditional blazer tailoring relies heavily on rigid woven fabrics, canvas linings, shoulder pads, and chest pieces to create structure. While this creates a beautiful silhouette, it can feel restrictive and requires hours of meticulous hand sewing. The Mollie Blazer, however, is built on three key design principles:
1. Knit fabric structure: Using stable, low-stretch knits allows the blazer to contour to the body naturally while offering complete freedom of movement.
2. Integrated shawl collar: Instead of a complex, multi-piece notched collar, the Mollie features a shawl collar that is drafted as an extension of the front body panel. This eliminates the tricky collar-attachment step and ensures a smooth, continuous roll.
3. Bias-bound seams: Rather than fully lining the blazer (which can add bulk and stiffness to knits), the interior seams are finished with bias tape binding. This creates a clean, designer-quality inside finish that is both flexible and beautiful to look at.
Choosing the Best Fabrics
Because this pattern is drafted to incorporate natural fabric ease and stretch, choosing the correct textile is critical to the success of your project.

Outer Fabric
Your main fabric must have moderate structure and excellent recovery (meaning it stretches when pulled but snaps back to its original shape immediately). Look for medium- to heavy-weight knits with a stretch percentage of 15% to 25%.
- Ponte Roma (Ponte de Roma): The absolute gold standard for knit tailoring. It is a stable, double-knit fabric that resists fraying, holds its shape, and has a smooth matte finish.
- Scuba or Techno Knit: A synthetic double-knit fabric with a smooth, slightly bouncy texture. It provides excellent structure and clean cut edges.
- Double-Knit Jacquard: Offers interesting textures and patterns (like houndstooth or herringbone) while maintaining the necessary stretch.
- Boiled Wool or Wool-Blend Knits: Ideal for a warmer, coat-style blazer. Ensure the wool has a knitted base to maintain flexibility.
- Lining and Facing Fabric: Since the Mollie Blazer is unlined, you will only need fabric for the front facing. It is highly recommended to use the same outer fabric for the facings to ensure the lapels roll with consistent weight.
- Fusible Interfacing: Do not use stiff, non-stretch woven interfacing, as it will fight against the stretch of your knit fabric and cause puckering.
- Tricot or Stretch Fusible Interfacing: A lightweight, knitted interfacing that fuses to the fabric while maintaining its natural stretch and recovery.
Essential Supplies
Before turning on your sewing machine, gather all the necessary tools and notions:

- Outer fashion fabric (approx. 2 to 2.5 yards, depending on width and size)
- Lightweight stretch fusible tricot interfacing (approx. 1 yard)
- Double-fold bias tape (1/2" wide, approx. 5 to 6 yards for seam binding)
- Stay tape or clear elastic (1/4" wide, approx. 1 yard to stabilize shoulder seams)
- 1 main blazer button (approx. 7/8" to 1")
- Soft shoulder pads (1/4" thickness, optional for added definition)
- High-quality all-purpose polyester thread (matching main fabric and bias tape)
- Ballpoint or stretch sewing machine needles (Size 80/12 or 90/14)
- Fabric shears or rotary cutter with cutting mat
- Tailor's chalk or disappearing fabric pen
- Iron and ironing board (a tailor's ham is also highly recommended)
- The Mollie Blazer Pattern Booklet PDF
Taking Accurate Measurements
Tailored garments require precise measurements to fit properly. Wrap the tape measure snugly but not tightly around your body, keeping it parallel to the floor.

- Bust Circumference: Measure around the fullest part of your chest, across the shoulder blades in the back.
- Natural Waist Circumference: Measure around the narrowest part of your torso, typically an inch or two above the belly button.
- Low Hip Circumference: Measure around the widest part of your hips and buttocks.
- Shoulder Width: Measure across the back from the outer edge of one shoulder bone to the outer edge of the other.
- Sleeve Length: Measure from the outer edge of the shoulder bone down to the wrist bone, with your elbow slightly bent.
Drafting or Choosing a Pattern
Refer to Section [1] (Custom Dimension Ledger) in your Mollie Blazer Pattern Booklet to calculate your custom pattern block widths:
- Bust block width = (Bust + 4" Ease) / 4 + 1.25"
- Waist block width = (Waist + 3" Ease) / 4 + 1.25"
- Hip block width = (Hip + 4" Ease) / 4 + 1.25"

Transfer these calculated values to your printouts of Panel 1 (Front Body), Panel 2 (Back Body), and Panel 3 (Sleeve Profile) to draft the final cut lines.
Cutting the Fabric
Fold your fabric right sides together, aligning the selvages. Lay out your pattern pieces, paying close attention to the grainline markings.

- Align the dashed grainline arrows on the pattern pieces precisely parallel to the fabric's selvage or knit ribs (the direction of vertical stretch).
- Pin the pattern pieces securely or use pattern weights.
- Cut the following pieces:
- Panel 1 (Front Body): Cut 2 (mirror-image pair) in main fabric
- Panel 1 Facing: Cut 2 (mirror-image pair) in main fabric (using the front edge template)
- Panel 2 (Back Body): Cut 2 (mirror-image pair) in main fabric
- Panel 3 (Sleeve Profile): Cut 2 (mirror-image pair) in main fabric
- Shawl Collar Under-Collar: Cut 2 in main fabric (if using a two-piece under-collar for better shape)
Applying Interfacing
Interfacing is the secret to professional tailoring. It provides the front panels with stability, prevents the collar from sagging, and ensures crisp buttonholes.

1. Cut corresponding interfacing pieces for:
- The Front Facings (complete coverage)
- The collar area of the Front Body panels (from the shoulder line up)
- The bottom hem of the sleeves (approx. 1.5" wide strip)
- The bottom hem of the body panels (approx. 1.5" wide strip)
2. Place the interfacing glue-side down on the wrong side of the fabric pieces.
3. Using a hot iron and a press cloth, press and hold the iron for 8 to 10 seconds per section. Lift and reposition the iron rather than sliding it to avoid shifting the interfacing.
4. Allow the fabric to cool completely before moving it; this lets the adhesive set permanently.
Sewing the Panels Together
Use a stretch stitch (a narrow zigzag stitch: 0.5mm width, 2.5mm length) or a serger to assemble the seams, ensuring they can stretch with the fabric without popping.

1. Center Back Seam: Place the two Panel 2 (Back Body) pieces right sides together. Pin along the center back line and sew. Press the seam allowances open.
2. Shoulder Seams: Place the Front Body panels and assembled Back Body right sides together at the shoulders. Pin.
3. To prevent the shoulders from stretching out over time, place a strip of 1/4" stay tape or clear elastic along the seamline. Sew through all layers (front, back, and tape). Press the seam allowances toward the back.
4. Side Seams: Pin the Front Body panels to the Back Body along the side seams, matching waist notch lines. Sew from the armhole down to the hem. Press open.
Topstitching the Seams
For a crisp, sporty look typical of knit blazers, topstitching is highly recommended.

1. From the right side of the garment, sew a straight stitch 1/8" away from the seamline, catching the pressed seam allowance underneath.
2. Always use a stretch needle and slightly loosen your top thread tension if the stitch looks strained.
Creating Facings and Collar Roll
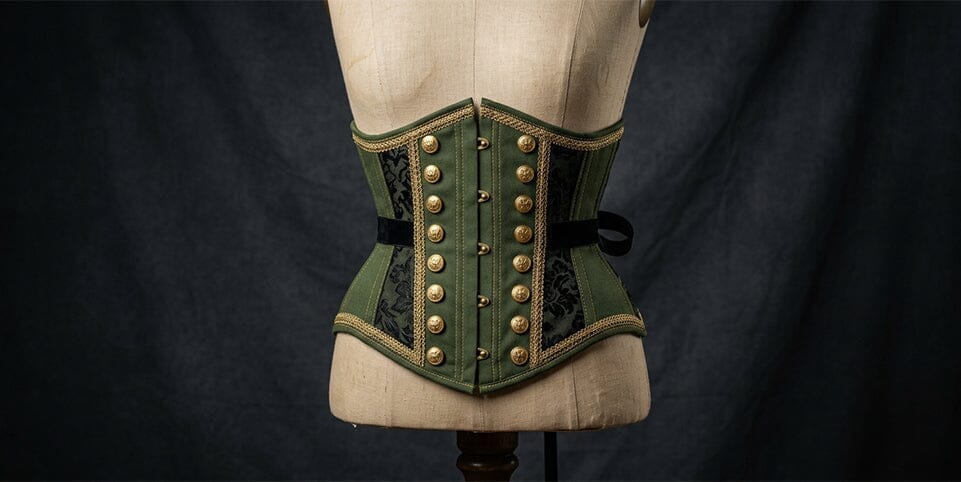
While the Victorian Corset Belt relies on rigid boning, the Mollie Blazer replaces this with structural facing reinforcement.

1. Lay the interfaced Front Facing pieces right sides together with the Front Body panels along the front edge and collar.
2. Pin carefully, matching the collar roll notches.
3. Sew along the entire front opening, around the lapel curves, and along the collar seam using a 1/2" seam allowance.
4. Clip the curves, grade the seam allowances (trimming the facing allowance slightly shorter than the body allowance to reduce bulk), and press.
5. Turn the facings to the inside, using a point turner to pop out the lapel corners. Press the edges flat to establish a crisp front roll.
Preparing the Front Closure
Decide on your button placement. The single button should sit at the narrowest part of your waist (refer to your waist guideline marking).

1. On the right-hand Front Body panel (as worn), mark the buttonhole placement. The buttonhole should be horizontal and start 1/8" away from the center front line.
2. Sew the buttonhole using your machine's automated buttonhole stitch. If your machine struggles with knit fabric, place a piece of tissue paper or water-soluble stabilizer on top and beneath the fabric while sewing, tearing it away afterward.
3. On the left-hand panel, sew the button to align perfectly with the buttonhole.
Sewing the Shawl Collar Center
The Mollie Blazer shawl collar meets at the center back of the neck.
1. Sew the center back collar seam of the Front Body extensions right sides together. Press open.
2. Sew the center back collar seam of the Front Facings right sides together. Press open.
3. Pin the collar edge of the blazer to the back neckline of the Back Body panel, matching the center back seams. Sew carefully from shoulder joint to shoulder joint.
4. Repeat this step to attach the facing collar to the inside neck area.

Preparing for Sleeve Installation
Knit sleeves drape beautifully but must be inserted correctly to avoid twist lines.
1. Sew the underarm seam of each Panel 3 (Sleeve Profile) piece right sides together. Press open.
2. Sew a row of long gathering stitches (basting stitch, 4.0mm length) around the cap of the sleeve from notch to notch, 3/8" away from the raw edge. Leave long thread tails.

Installing the Sleeves
1. Turn the blazer body wrong side out, and the sleeve right side out.
2. Insert the sleeve into the armhole, matching the underarm seams, center shoulder seam, and notches. Pin at these key points.
3. Gently pull the basting thread tails to gather the sleeve cap slightly until it fits the armhole opening perfectly. Distribute the fullness evenly around the upper curves; there should be no visible gathers or puckers once pinned.
4. Pin the rest of the sleeve cap securely.
5. Sew the sleeve to the armhole slowly, keeping the sleeve side facing up so you can monitor the gathers and adjust them as you sew.
6. Press the seam allowance toward the sleeve. If desired, insert a 1/4" soft shoulder pad at the shoulder seam, securing it by hand-stitching it to the shoulder seam allowance.

Binding the Edges (Interior Seam Finish)
Because the Mollie Blazer is unlined, finishing the raw seam allowances with double-fold bias tape creates a stunning, professional look.
1. Wrap 1/2" double-fold bias tape around the raw edges of the side seams, center back seam, and sleeve armholes.
2. Edgestitch the bias tape in place, catching both the front and back folds of the tape.
3. Press all bound seams thoroughly. This technique, known as the "Hong Kong finish," ensures that the interior of your blazer looks as beautiful as the exterior.

Hemming the Blazer and Sleeves
1. Fold the bottom hem of the blazer up by 1" toward the inside. Pin or baste in place.
2. Fold the sleeve cuffs up by 1" toward the inside. Pin.
3. Secure the hems using a twin-needle (which creates two parallel rows of straight stitching on the outside and a zigzag stretch stitch on the inside) or a blind hem stitch.
4. Give the hems a final steam press.

Adding Decorative Details
To enhance the custom look of your blazer:
1. Sew patch pockets to the lower front panels, ensuring they are positioned symmetrically.
2. Add decorative topstitching along the lapel and collar edges.
3. Use contrasting button thread or select a statement button (metallic, horn, or fabric-covered) to serve as a focal point.

Final Fitting and Adjustments
Try on the blazer and inspect the fit in a mirror:
1. The shoulder seams should rest directly on your shoulder bones.
2. The collar should hug the back of your neck comfortably without gaping.
3. The lapels should roll smoothly to the waist button without pulling or bubbling.
4. Move your arms forward; the stretch fabric should allow full range of motion without straining the back panel.

Common Mistakes to Avoid
1. Using rigid woven fabric: This pattern is drafted specifically for knit ease. Woven fabrics will result in a blazer that is far too tight.
2. Skipping stretch interfacing: Normal interfacing will ruin the elasticity of the lapel and front edges.
3. Using a universal needle: Universal needles can cut the knit fibers, causing skipped stitches or holes in the fabric over time. Always use a ballpoint/stretch needle.
4. Pulling fabric while sewing: Let the machine feed the fabric naturally. Pulling or stretching the knit fabric while sewing will result in wavy, stretched-out seams.
Caring for Your Mollie Blazer
1. Washing: Hand wash or use a gentle/delicate washing machine cycle with cold water to protect the knit fibers and interfacing.
2. Drying: Lay flat to dry on a clean towel. Never hang a wet knit blazer, as the weight of the water will stretch out the shoulders.
3. Ironing: Use a medium setting with steam. Always use a press cloth over synthetic fibers (like polyester/scuba) to prevent scorch marks or fabric shine.

Conclusion
Sewing a Mollie Blazer is an extremely satisfying project that introduces you to the world of modern tailoring. By swapping traditional rigid components for stable knit fabrics and stretch interfacings, you can create a beautifully structured jacket that is comfortable enough for all-day wear.
With patience, careful pressing after each step, and attention to detail, your handmade Mollie Blazer will quickly become a cherished favorite in your wardrobe. Experiment with different colors, textures, and custom button details to make the design truly your own!
1 comment
Lan Truong
I am not good with email. May I have local store address or phone number so I can Oder that. Or you can help walk me through how to Oder online. Thank you so much.
Lan
I am not good with email. May I have local store address or phone number so I can Oder that. Or you can help walk me through how to Oder online. Thank you so much.
Lan