 White
White
 Pink
Pink
 Red
Red
 Orange
 Ivory
Ivory
 Yellow
 Gold
Gold
 Brown
Brown
 Green
Green
 Blue
Blue
 Purple
 Grey
Grey
 Black
Black
 Multi
Multi
 Abstract
 African Print
 Animal Print
 Baby & Nursery
 Buffalo Check
 Camo Print
 Celestial
 Church
 Damask
 Embroidered
 Floral
 Geometric
 Gingham Check
 Houndstooth
 Licensed
 Paisley
 Plaid
Plaid
 Polka Dot
 Sports
 Stripe
 Tie Dye

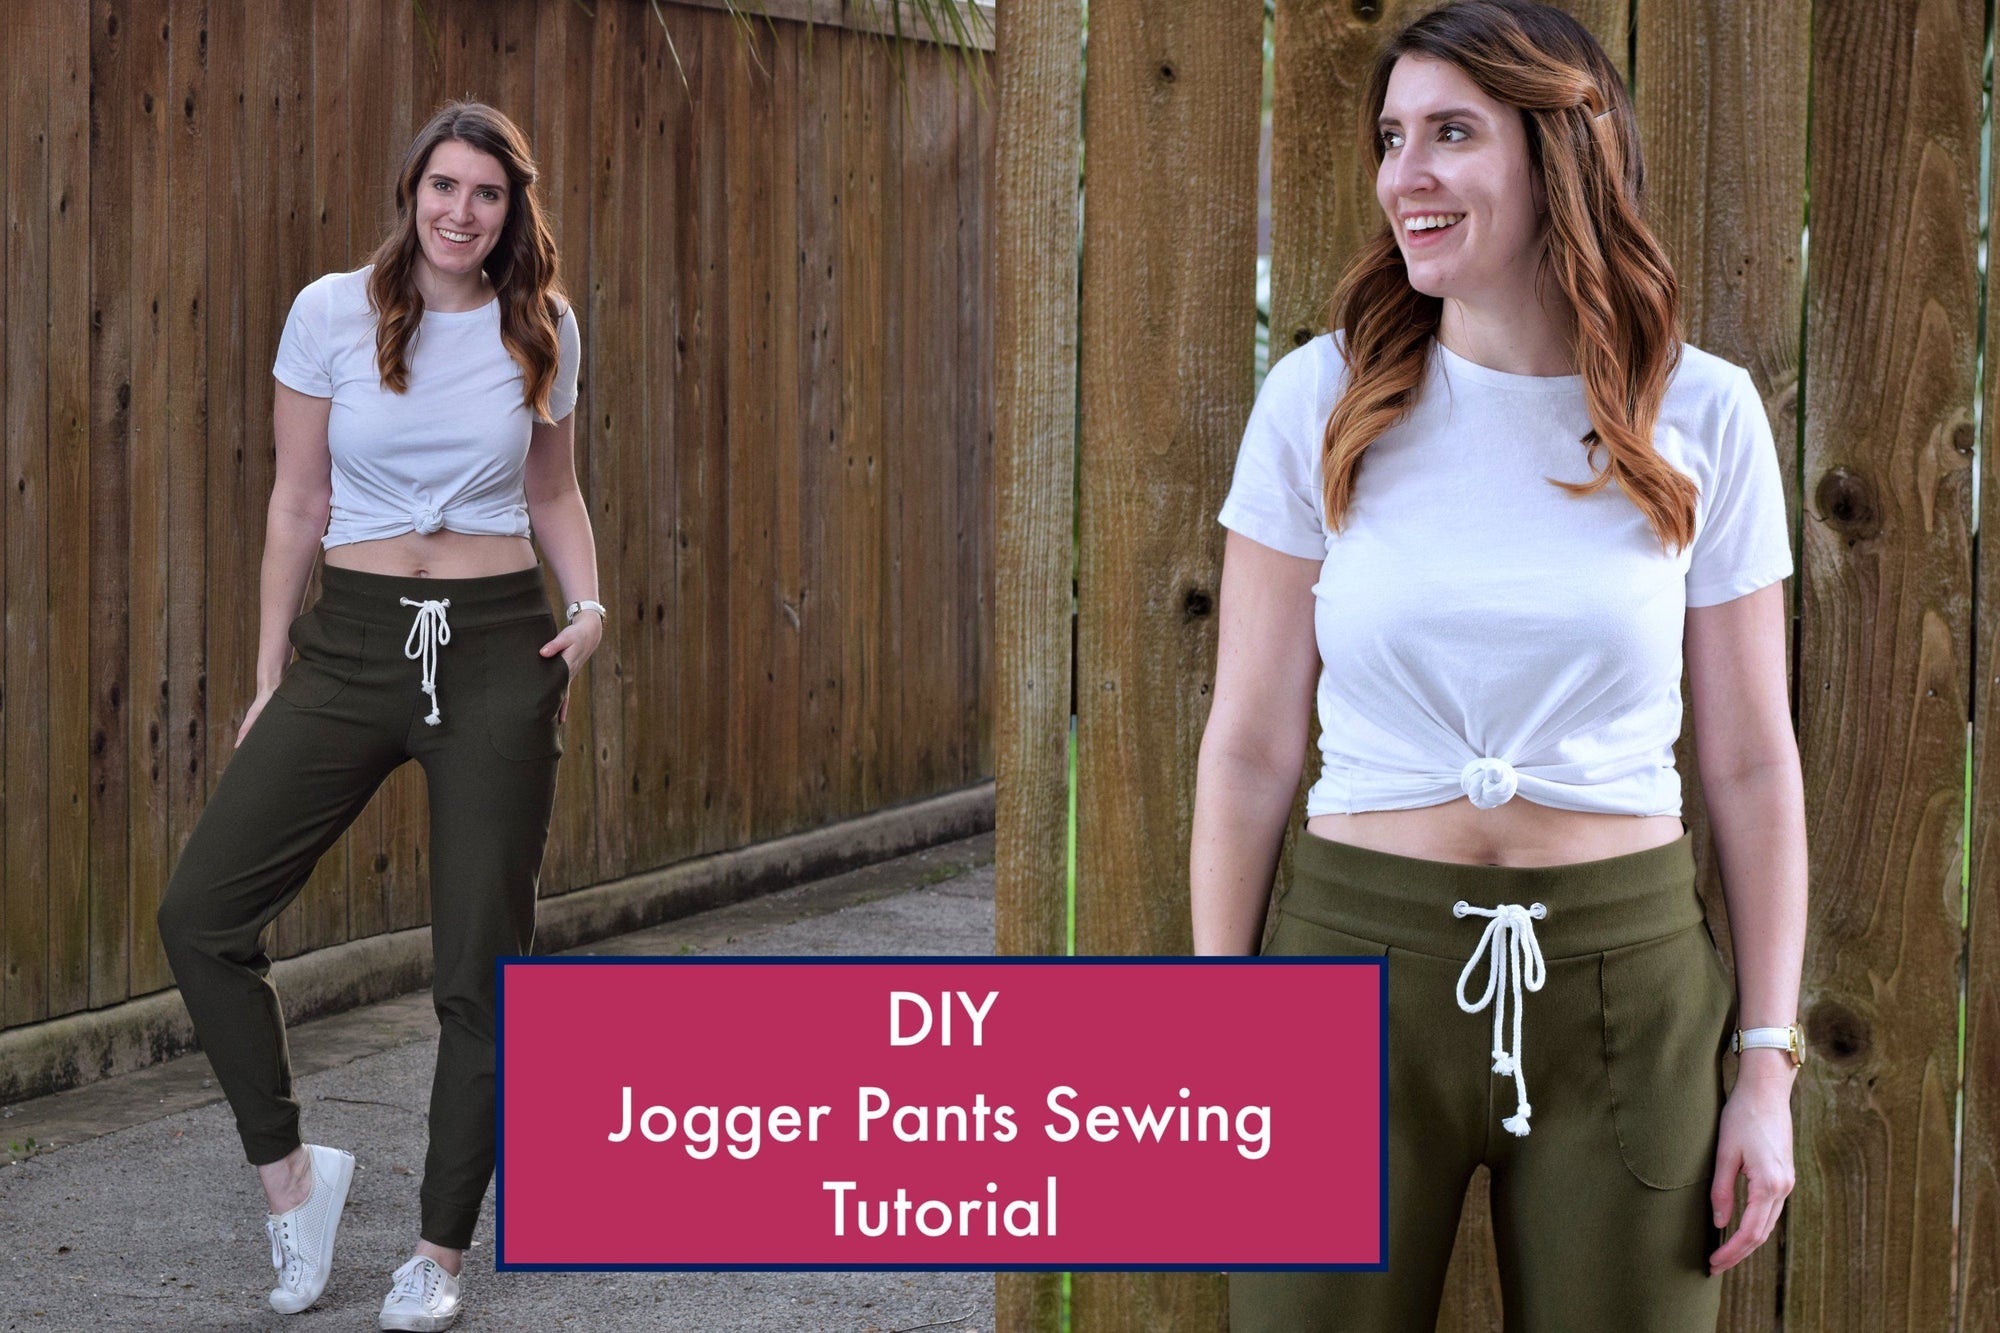
Hi everyone, Jenny here from Modafique! Are you ready for the upcoming St. Patty’s Day? Grab yourself some lace and jersey knit to follow along this easy tutorial! I absolutely love the way a lace piece makes you feel. Even if it’s a pretty casual piece, the right lace can jazz it up just enough.
This beautiful spring green guipure lace gives me the pop of green I’m looking for, but don’t worry, if it’s not the color for you, there are plenty of styles and colors to choose from!
Larger lace sometimes presents a time challenge, but using plenty of pins will save you!
Don’t let lace scare you, though. I would not limit this top to more advanced sewers because I believe beginners can definitely accomplish this with the help of the tutorial! So follow along, dig in, and let me know if you have any questions!
SUPPLIES:
- 2 yards White Cotton Jersey
- .5 yard Guipure Lace
- Thread to Match
- Measuring Tape
- Fabric Scissors
- Pins
- Sewing Machine
- Pencil, Tank and Scissors to make pattern
Optional: - Serger
- Maxi Lock Thread
Time: 1-2 hours
Difficulty: Easy

CREATING YOUR PATTERN:
We are going to use a tank that already fits to make this easier so you don’t need to worry about the amount of stretch and drafting a pattern.
Measurements needed:
Cuff length (mine was 2 inches)
- Cuff width minus 1 inch (mine was 9 inches)
- Neck opening to end of sleeve, minus cuff width (Mine was 21 inches)
- Shoulder to hemline (mine was 21 inches)
- Lace width on arm (mine was 4 inches)


- Fold your main fabric in half, selvage to selvage. Fold your tank in half, place it along the fabric Make sure you leave yourself enough room for your length (shoulder to hemline plus 1 inch).
- Mark your sleeve length on your fabric for reference (A).
- Trace from waist to hemline of your tank, add 1 inch for the hemline (B).
- Trace your desired neckline, leave ⅜” for the seam allowance (C).
- Draw a line from your neckline to your sleeve measurement (D). I go on a little bit of an angle. You can go straight across or angled further! This will determine how much excess fabric you have at the armpit.
- Divide your cuff width by two. Draw squared line down from shoulder length (E).
- Here is the fun/eyeball part! Draw your sleeve shape (F).
The joy of dolman tops are they can be as loose or tight as you want them. Aesthetically, I prefer my dolman sleeve to be on the tighter side. I normally start my curve at my waistline, where we started line B. I find this gives me the most flattering line, but you may want something different! - Draw a straight or curved line for your hem (G).
- Give yourself a ⅜” seam allowance around all parts and cut
- Cut a second one!
- Keep fabric folded, and lay both on top of each other. Measure out 2 inches along neckline to cuff (H), (don’t add extra seam allowance!), discard.
TIP: I only went to about 1.5 inches at the neckline, for added aesthetics.
- Cut 2 rectangles 2x your cuff width by length plus ⅜” seam allowance on all sides. Mine was 9.75 inches x 4.75 inches.
- Fold your lace in half, measure 2 inches, add ⅜” seam allowance to all sides and cut
- I like to match my patterns, so I turned my lace over and matched the pattern.
TIP: cut your lace on a slight angle to avoid repeated patterns
SEW YOUR TOP:
The hard part is over! You will see me state to serge a lot. If you don’t have a serger, here you can see how to use your regular machine in its place. Always remember to PRESS your seams! Every seam, every time. You’ll be surprised how crisp your garments look if you do this regularly.
- Start out sewing your lace to main fabric along sleeve. There is no front or back, so you only need to think about right sides of fabric. Repeat on other side.

TIP: Lots of pins if you’re worried about the holes of the lace. I sew on my regular sewing machine for a straight stitch, then serge the seam for extra durability.

- Fold shirt with right sides together to sew side seam. Serge from cuff to hemline. Repeat on other side.

- Fold cuff horizontally, serge ends together. Turn right side out and fold in half lengthwise.

- With right sides together, line up seams of cuff and sleeve opening Stretch and pin cuff evenly to sleeve opening, then serge. You can do this by physically pulling the two fabrics together if you’re comfortable, or pinning in quarters to ensure even stretch all around. Repeat on other side.


Here is what your sleeve will look like, inside and out, when you are finished.
- I decided to not make a neck binding, and instead serged my ends, then sew over top with a straight stitch. I used a coverstitch for this step, but it works perfectly well with a regular sewing machine! Turn your neckline over ¼”, then sew. Pinning makes this step much easier, especially over the lace.


TIP: You can hand stitch that little bit of lace if you’re having a difficult time getting it to stay. I like to iron the piece down as well before I stitch over top.
- Fold your hemline up 1 inch, sew along hemline.

That’s it! Change up the styling for any occasion or holiday with just a different color lace! Mine is perfect to celebrate Paddy’s day (or the past Eagles game). Stick with a simple white for an easy everyday shirt!

1 comment
MonicaAD
Very nice top and tutorial :)
Very nice top and tutorial :)