White
White
 Pink
Pink
 Red
Red
 Orange
 Ivory
Ivory
 Yellow
 Gold
Gold
 Brown
Brown
 Green
Green
 Blue
Blue
 Purple
 Grey
Grey
 Black
Black
 Multi
Multi
 Abstract
 African Print
 Animal Print
 Baby & Nursery
 Buffalo Check
 Camo Print
 Celestial
 Church
 Damask
 Embroidered
 Floral
 Geometric
 Gingham Check
 Houndstooth
 Licensed
 Paisley
 Plaid
Plaid
 Polka Dot
 Sports
 Stripe
 Tie Dye

Project Description
Buttons are a wonderful closure for shirts, dresses, pants, bags, decorative pillowcases, and more. Because they’re so useful, knowing how to sew a button is a great technique to add to your sewing skill toolbox.
Thankfully, sewing a button is quite simple and fast. In this tutorial, you’ll learn how the most common type of button, a sew-though, 2-hole button.
Supplies
Here are the supplies you’ll need to sew a button.
- Sew-Through, 2-Hole Button
- Fabric
- Matching Thread
- Toothpick or Sewing Pins
- Scissors
- Fabric Marker / Tailor’s Chalk
- Sewing Needle
- Fray Check

How to Sew a Sew-Through Button
Sew-through buttons are the most commonly found type of button. Sew-through buttons have holes on their surfaces that can be sewn through and attached to fabric. Generally speaking, sew-through buttons will have either 2 or 4 holes; however, 3-hole sew-through buttons do exist. In this tutorial, we will discuss how to attach a 2-hole, sew-through button to fabric.

How To Sew A Button
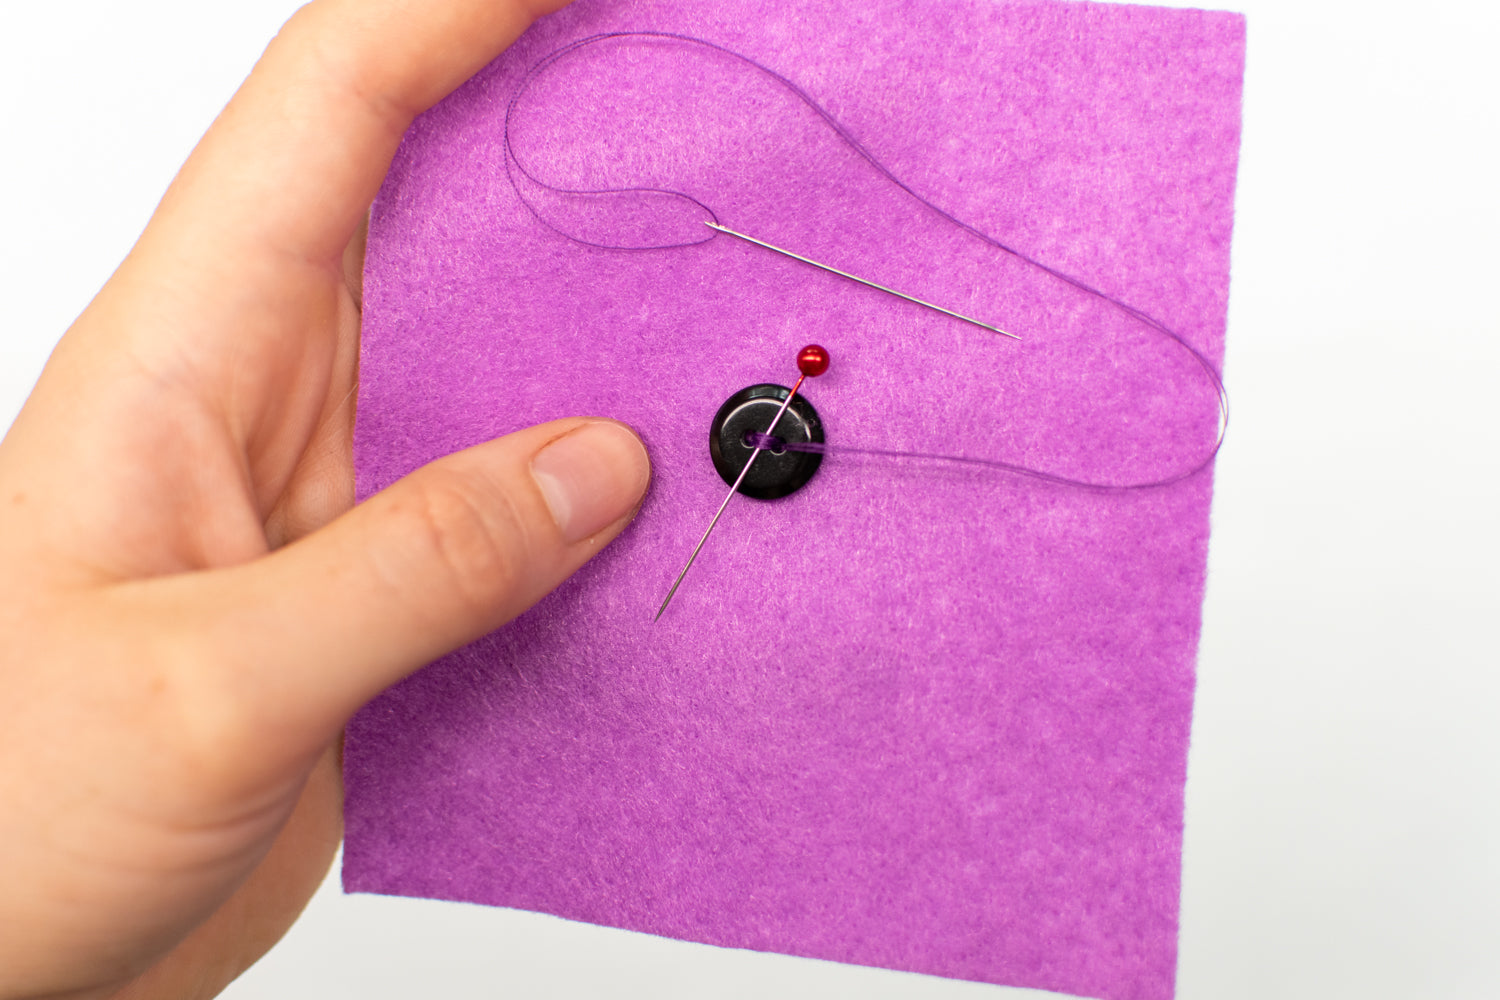
STEP 1 Mark The Button Placement
The first step to sewing a button is to mark the button placement on the fabric with a fabric marker or tailor’s chalk.


STEP 2 Thread Your Needle
Next, cut a piece of thread that is approximately 20 inches long. Pass one end of the thread through the eye of a sewing needle. Hold both ends of the thread and allow the needle to fall, so that now the needle is at the center of the thread.
STEP 3 Knot The Ends
Knot the two ends of the thread together with a double or triple knot. Next, trim the thread tails close to the knot.


STEP 4 Start The First Stitch
With the needle and thread in hand, hold the button in place over the button placement mark. Then, push the needle into the wrong side of the fabric, and through one of the holes in the button. Pull the thread until the knot is taut against the back of the fabric.
STEP 5 Finish The First Stitch
Now, push the needle through the second buttonhole, to the left of the first hole. Then push the needle through the fabric and pull the thread taut.


STEP 6 Place The Spacer
Next, slide a spacer, which can be a sewing pin or similarly shaped item, underneath this first stitch, on top of the button. This will act as a spacer and keep the threads from holding the button too tightly to the fabric.
STEP 7 Start The Second Stitch
Push the needle up, into the fabric, and through the first hole. Pull the thread tight.


STEP 8 Finish The Second Stitch
Insert the needle down into the second hole in the button, and through the fabric. Pull the thread taut.
STEP 9 Stitch Through The Button Again
Repeat Steps 7 and 8 to sew through the holes in the button another 3 or 4 times.


STEP 10 Finalizing The Button
To finalize the button, push the needle and thread up through the wrong side of the fabric and into the first holes.
STEP 11 Bring The Thread Between The Button And The Fabric
To finish the dress stitch elastic to waist seamThen, push the needle into the second hole, but instead of going through the fabric, angle the needle so that it comes out below the button. Pull the thread through the button until it is taut.

STEP 12 Create A Shank
Next, wrap the thread 5 or 6 times around the stitches below the button. This creates a shank that will hold the button permanently away from the fabric.
STEP 13 Bring The Thread To The Wrong Side
Now, push the needle at the base of the button, pulling the thread through the fabric to the wrong side. At this point, you can now remove the spacer from on top of the button.


STEP 14 Knot Thread
To knot the thread, first pass the needle underneath a few of the stitches on the wrong side of the fabric. Next, pull the thread through, but not all the way, so that it creates a loop. Then, pass the needle through the loop and pull it tight. The knot should press firmly against the fabric.
STEP 15 Knot The Thread Again
Repeat Step 14 to knot the thread a few more times. This will ensure that the button is securely attached to the fabric.


STEP 16 Trim Thread Tails and Fray Check
Finally, trim any thread tails, and dot a small amount of Fray Check on all of the knots to make them more secure. Your sew-through button is now attached to the fabric.